How to set up your DSLR
In this article I will start with the single most important thing when shooting landscape photography; understanding how to use your DLSR in the best possible way.
Even if you can do many things nowadays in the post processing, you really can`t do anything to make it look perfect if the photo is out of focus or has a lot of noise.
And nothing is more annoying when looking at the camera screen and thinking “Wow this looks awesome!”, only to get home to the bigger screen and realize that it is just a blurry mess. Hopefully you will be able to avoid that after reading this article.
In photography there are three things you need good knowledge of when it comes to camera settings, and those are aperture, shutter speed and ISO.
The exposure triangle
The aperture measures how much light will enter the camera by opening or closing the iris of the camera.
A wide aperture is set with lower F stop like for instance f2.8 or f4 and will let more light in, while a higher F stop means narrower aperture and will let less light in to the sensor.
The aperture also impacts the depth of field. A wide aperture creates a narrow depth of field making less of the frame in focus.
This is for example used when shooting animals, and you want the animal in focus and the background out of focus.
While a narrow aperture creates a wider depth of field making more of the frame in focus. Used in for example landscape photography.
I usually shoot my landscape photos in f10-f14, making most of the scene in focus.
Shutter speed measures how long the shutter stays open while taking a photo. The longer the shutter speed is, the more light will enter the sensor.
A fast shutter speed will create a sharper and more detailed photo, while a long shutter speed creates flow motion in for instance water.
When you’re not using a tripod, you should aim for a bit faster shutter speed. This will create less motion on the camera, giving you a sharper image.
This if course is also depending on what gear you’re using and how well the built in stabilizer works.
Working with higher ISO is used so that you are able to shoot in less light, though high ISO will make noise enter the image.
In landscape photograpy you sometimes will have no other choice than to increase the ISO up to where there might be noise.
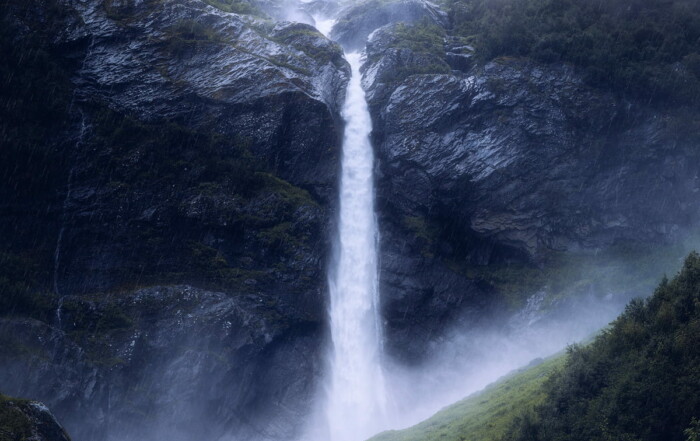
Say you are photographing a waterfall and you want to capture a lot of details in the water. Then you will need a wide aperture and a fast shutter speed, meaning that here is not much light entering the sensor. Then you can compensate this by increasing the ISO.
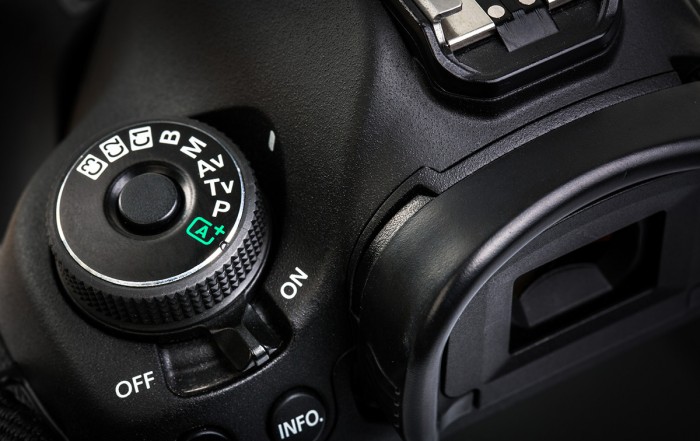
Shooting mode
There will always be an argument of what mode is the best one to shoot in.
I am not going to go into all of those modes, since I mostly shoot in manual mode. Which is the preferred mode for many landscape photographers.
But the important thing is to step away from automatic mode, even if that may sound scary for a beginner.
In automatic mode the camera is in charge of how the photo will end up, but instead you will want to be in charge of that.
The two most common modes to do that for landscape photography are aperture-priority and manual mode.
These may look differently on your mode dial, depending on what camera you are using.
In aperture-priority you set the aperture manually, while the camera sets the correct shutter speed so that the photo will be exposed properly.
The aperture-priority mode works well in most landscape photography. Yet I find that mastering the manual mode, where I take control of all the functions myself, makes me more certain that I will get the end product that I want.
And I will for that reason go more detailed into the manual mode.
In manual mode you will have to set up exposure, shutter speed and ISO manually.
And even if that may sound difficult, it is actually easier than one should think.
Most modern cameras have what is called metering, and is a very sophisticated tool at the bottom showing 3 2 1 0 1 2 3 when looking into the viewfinder.

When photographing, this tool will tell you if the camera settings are set up properly with shutter speed and aperture to get the best exposure.
If the arrow, which will show up under the numbers when focusing is to the left, the exposure is too dark. And to the right the exposure is too bright.
Let us say it is at +1, so too bright. Then you will have to adjust the settings by for instance increasing the F stop to let less light in and by doing so making the shot darker.
When the arrow is at the middle, the exposure is correct and you are ready to shoot.
You can also use this tool to underexpose or overexpose the shot if that is preferred. I often lean towards -1 when I shoot some of my more moody photos, to get it a bit darker already before the post processing.
By default the metering is set to evaluative / matrix metering where it evaluates the light in the whole frame, and this works well in most landscape photography.
But you can also narrow it down to center-weighted metering where the camera evaluates the light in the middle of the frame.
Or spot metering, where it evaluates the light on just one focus point.
So what are the best settings to shoot landscape photography and at the same time having that arrow in the middle of the metering?
That all depends on the time of the day and the light.
A good rule is to start around f10-f14 and ISO 100. This will give you a wide depth of field and for that reason both a sharper forground and background, yet not making the shot too dark. Then adjust the shutter speed to get the metering correct.
I often shoot in the evening light, which I find looks best for landscape photography. If you use wider aperture like for instance f4, you will catch more light.
The lower F stop, the more light lets in to the camera. But at the same time the corners will not be as sharp as you would like. By adjusting to a higher F stop more of the photo will be in focus and the end result will be a sharper image throughout.
On ISO, the lower number the less light is letting in.
Modern cameras will let you adjust the ISO pretty high, but at the same time you will get more noise into the photography.
If you prefer shooting at night time catching the Milky way or the Northern light you will have to adjust it a bit differently.
Then you will want to catch as much light as possible, and the settings may for instance be F2.8 and ISO 1600.
This will let a lot of light in, but will at the same time add some noise to the photo.
The higher ISO, the more noise you will get.
If you think that the shots get too dark due to lack of light in the scene you are shooting, always avoid using the built in flash. This flash creates a rally harsh light that does not look good.
Then it is better to adjust the settings to a higher ISO. You will get some noise, yet it will still look much better than the light from the flash.
Focusing
When shooting with a DSLR, set the focus on your lense to auto and lightly push the button first before shooting to focus.
A good way to get the focus properly, is to use the focus points which most modern cameras have.
The amount of focus points will depend on what camera you are using, but even if there are only a few it is still a great tool.
How the focus points will appear, also depends on what camera your are using, but they usually look something like this when looking into the viewfinder:

When halfpressing the button, these focus points will tell you where the camera is focusing.
The part of the frame where the focus points are highlighted, is the area that the camera is focusing on.
You can choose to use all the focus points, or you can narrow it down to less focus points and at the same time move them or it around. Which is the preferred way, since then you are in total control of where the camera is focusing.
If you use the rule of third you will set the focus point accordingly, making that object in focus and sharp.
Or if you want an out of focus foreground, but a sharp background you will set the focus points on the background and none on the foreground.
Which is a great way of framing a shot. But then you must also remember, as mentioned earlier, that you will have to use a lower F stop to get a narrower depth of field.
When you are moving the focus point(s), you will notice that the metering is moving depending on how bright or dark the part you are focusing on is.
So when you have found your focus, be sure to check the metering and adjust it if needed.
Okay, so now the metering is correct and the focus is set properly. You take the shot, walk home happily only to find out it is still not crystal sharp. Why?
Getting sharp photos
When taking handheld photos, you may feel that you are holding the camera still, yet the smallest movement will have the photo end up not as sharp as we want it to be.
Most lenses will have an image stabilizer which will help you get sharper photos. When taking handheld photos always make sure that the stabilizer is switched on. Also the faster shutter speed you use, the bigger are the chances of ending up with a sharp photo.
This is particularly important when shooting with a tele. A good rule here is to set the shutter speed faster than the focal length.
If you are for instance shooting with a 200mm, set the shutter speed to at least 1/250.
Or if you’re shooting with a 600mm lense, set shutter speed to at least 1/650.
But the most secure way to get a sharp photo, is by using a tripod. Then you will have no movement at all on the camera.
There is a jungle of tripods out there, but be sure to have a sturdy one and also that the ground you are setting it up on is sturdy.
I will probaly talk more about equipment in a later post, but if you are thinking of buying a tripod, make sure it has a arca-swiss head.
This makes mounting the camera much easier.
If you still have the stabilizer on the lense switched on, you will want to turn it off when using the tripod. If it is on, there might be some movement on the camera when shooting on a tripod. The image stabilizer might actually create a light movement when it can not find any movement at all.
So when the camera is on a tripod and focus and metering is set, the next thing is to set the self timer on the camera to two seconds to avoid the shake that may appear when pushing the button.
And you will end up with a landscape photo which is both sharp and well exposed.
This will need some practice, but the more you practice the faster you will be able to learn what settings to use according to the light and time of day.
Recent articles
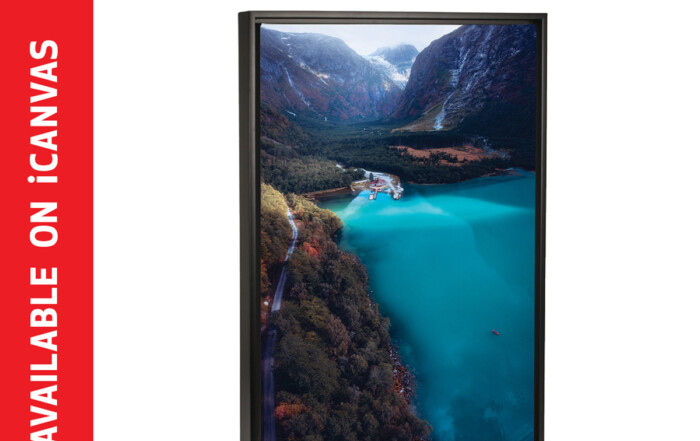
Buy my prints
Buy my prints I have teamed up with the American company iCanvas on selling my photography with worldwide shipping. They offer beautiful handcrafted canvases and wall art with lifetime warranty to a [...]
Setting up your DSLR
How to set up your DSLR In this article I will start with the single most important thing when shooting landscape photography; understanding how to use your DLSR in the best possible [...]
Supersize in Photoshop
Supersize your photos without quality loss in Photoshop In the latest Photoshop update (March 2021) they have dived deeper into the AI technology, returning with an impressive tool to double the size [...]